How to Implement Redis Cache in .NET Core Web API
 |
Vivek Jaiswal |
3670 |
{{e.like}} |
{{e.dislike}} |
Watch Video Download Code
Introduction
In this article, I will discuss how to use Redis Cache in a .NET Core Web API. Caching plays a crucial role in building high-performance web applications. It reduces database load and response time by temporarily storing frequently accessed data.
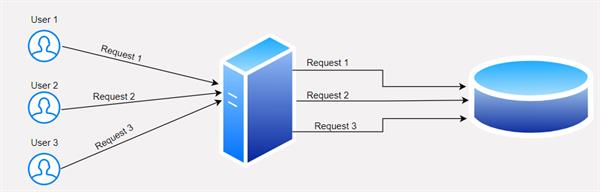
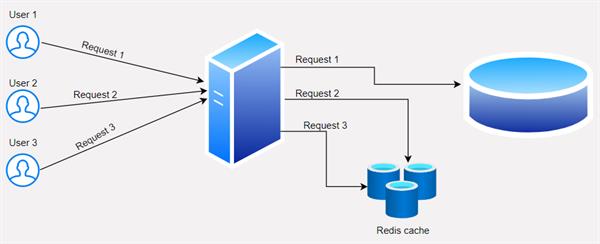
Without Cache
When no cache is used, every user request hits the database to fetch data. This increases response time and reduces performance, especially for static data that remains the same for all users.
With Cache
When caching is implemented, static data or common data for all users is stored in the cache after the first database request. Subsequent user requests retrieve data from the cache, significantly reducing response time and database load.
Prerequisites
Step 1
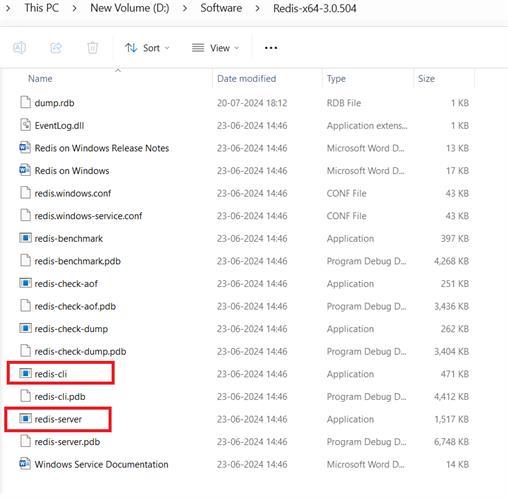
Download the Redis server from the official GitHub repository.
Step 2
Extract the downloaded file, open Redis Server, and launch Redis CLI.
Implementation
Follow these instructions to implement Redis cache in an ASP.NET Core Web API.
Step 1: Create a .NET Core Web API Application
Create a new .NET Core Web API project in Visual Studio.
Step 2: Install Required NuGet Packages
Install the following NuGet packages to configure Entity Framework and Redis Cache:
Microsoft.EntityFrameworkCoreMicrosoft.EntityFrameworkCore.SqlServerMicrosoft.EntityFrameworkCore.ToolsStackExchange.RedisSwashbuckle.AspNetCore
Step3: Scaffold the Database Context
Run the following command in the Package Manager Console to generate table structure classes and the DbContext class:
Scaffold-DbContext "Data Source=Server;Initial Catalog=DemoTestDB;Integrated Security=True;Encrypt=True;TrustServerCertificate=True;" Microsoft.EntityFrameworkCore.SqlServer -OutputDir Models
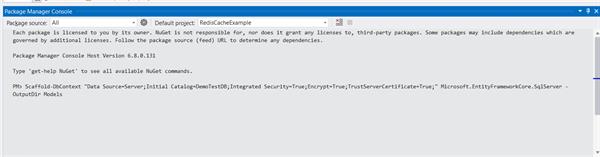
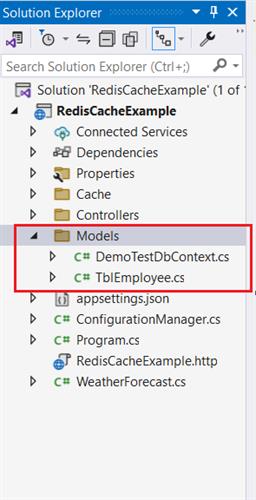
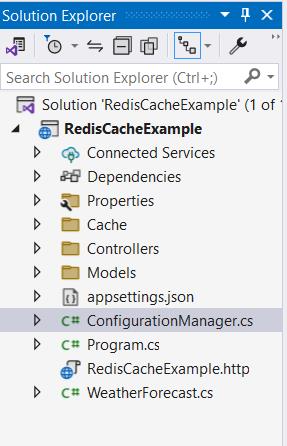
This will generate the DemoTestDbContext class in the Models folder.
using Microsoft.EntityFrameworkCore;
namespace RedisCacheExample.Models;

public partial class DemoTestDbContext : DbContext
{
    public DemoTestDbContext()
    {
    }

    public DemoTestDbContext(DbContextOptions<DemoTestDbContext> options)
        : base(options)
    {
    }

    public virtual DbSet<TblEmployee> TblEmployees { get; set; }

    protected override void OnConfiguring(DbContextOptionsBuilder optionsBuilder)
        => optionsBuilder.UseSqlServer("Data Source=LAPTOP-DBC342FV;Initial Catalog=DemoTestDB;Integrated Security=True;Encrypt=True;TrustServerCertificate=True;");

    protected override void OnModelCreating(ModelBuilder modelBuilder)
    {
        modelBuilder.Entity<TblEmployee>(entity =>
        {
            entity.HasKey(e => e.Id).HasName("PK__tbl_Empl__3214EC27F39C1F9F");

            entity.ToTable("tbl_Employee");

            entity.Property(e => e.Id)
                .ValueGeneratedNever()
                .HasColumnName("ID");
            entity.Property(e => e.CreatedDate)
                .HasDefaultValueSql("(getdate())")
                .HasColumnName("Created_date");
            entity.Property(e => e.Designation).HasMaxLength(200);
            entity.Property(e => e.Email).HasMaxLength(200);
            entity.Property(e => e.EmpName)
                .HasMaxLength(200)
                .HasColumnName("Emp_Name");
        });

        OnModelCreatingPartial(modelBuilder);
    }

    partial void OnModelCreatingPartial(ModelBuilder modelBuilder);
}
The TblEmployee class looks like this:
namespace RedisCacheExample.Models;

public partial class TblEmployee
{
    public int Id { get; set; }

    public string? Email { get; set; }

    public string? EmpName { get; set; }

    public string? Designation { get; set; }

    public DateOnly? CreatedDate { get; set; }
}
Step 4: Update appsettings.json
Add Redis URL and database connection strings in the appsettings.json file:
You can find Redis URL from the Redis CLI as like below

{
  "Logging": {
    "LogLevel": {
      "Default": "Information",
      "Microsoft.AspNetCore": "Warning"
    }
  },
  "AllowedHosts": "*",
  "RedisURL": "127.0.0.1:6379",
  "ConnectionStrings": {
    "DefaultConnection": "Data Source=LAPTOP-DBC342FV;Initial Catalog=DemoTestDB;Integrated Security=True;Encrypt=True;TrustServerCertificate=True;"
  }
}
Step 5: Create ConfigurationManager
Create a ConfigurationManager class to fetch data from appsettings.json:
namespace RedisCacheExample
{
    public class ConfigurationManager
    {
        public static IConfiguration AppSetting { get; }
        static ConfigurationManager()
        {
            AppSetting = new ConfigurationBuilder()
                .SetBasePath(Directory.GetCurrentDirectory())
                .AddJsonFile("appsettings.json", optional: true, reloadOnChange: true)
                .Build();
        }
    }
}
Step 6: Implement Cache Service
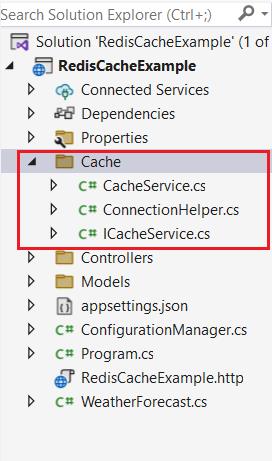
Create ICacheService, CacheService, and ConnectionHelper classes to handle Redis-related configurations.
ICacheService Interface:
namespace RedisCacheExample.Cache
{
    public interface ICacheService
    {
        T GetData<T>(string key);
        bool SetData<T>(string key, T value, DateTimeOffset expirationTime);
        object RemoveData(string key);
    }
}
ConnectionHelper Class: Write below code to create connection with Redis Server.
using StackExchange.Redis;

namespace RedisCacheExample.Cache
{
    public class ConnectionHelper
    {
        private static Lazy<ConnectionMultiplexer> lazyConnection;
        static ConnectionHelper()
        {
            lazyConnection  = new Lazy<ConnectionMultiplexer>(() =>
            {
                return ConnectionMultiplexer.Connect(ConfigurationManager.AppSetting["RedisURL"]);
            });
        }

        public static ConnectionMultiplexer Connection
        {
            get
            {
                return lazyConnection.Value;
            }
        }
    }
}
CacheService Implementation:
using Newtonsoft.Json;
using StackExchange.Redis;

namespace RedisCacheExample.Cache
{
    public class CacheService : ICacheService
    {
        private IDatabase _db;
        public CacheService()
        {
            _db = ConnectionHelper.Connection.GetDatabase();
        }
        public T GetData<T>(string key)
        {
            var value = _db.StringGet(key);
            if (!value.IsNull)
            {
                return JsonConvert.DeserializeObject<T>(value);
            }
            return default;
        }

        public object RemoveData(string key)
        {
           bool isExist = _db.KeyExists(key);
            if (isExist)
            {
                return _db.KeyDelete(key);
            }
            return false;
        }

        public bool SetData<T>(string key, T value, DateTimeOffset expirationTime)
        {
            TimeSpan expiryTime = expirationTime.DateTime.Subtract(DateTime.Now);
            var isSet = _db.StringSet(key, JsonConvert.SerializeObject(value), expiryTime);
            return isSet;
        }
    }
}
As we can see in above code firstly check the data into Redis cache if this found then get the data from Redis cache otherwise hit the database and then get the requested data.
Step 7: Create the Controller
Create a controller to handle API requests.
using Microsoft.AspNetCore.Mvc;
using RedisCacheExample.Cache;
using RedisCacheExample.Models;

namespace RedisCacheExample.Controllers
{
    [Route("api/[controller]")]
    [ApiController]
    public class EmployeeController : ControllerBase
    {
        private readonly ICacheService _cacheService;
        private readonly DemoTestDbContext _demoTestDbContext;
        public EmployeeController(ICacheService cacheService, DemoTestDbContext demoTestDbContext)
        {
            _cacheService = cacheService;
            _demoTestDbContext = demoTestDbContext;
        }

        [HttpGet("Employees")]
        public IEnumerable<TblEmployee> Get()
        {
            var cacheddata = _cacheService.GetData<IEnumerable<TblEmployee>>("Employees");
            if(cacheddata != null)
            {
                return cacheddata;
            }
            var expirationTime  = DateTime.Now.AddMinutes(5);
            cacheddata = _demoTestDbContext.TblEmployees.ToList();
            _cacheService.SetData<IEnumerable<TblEmployee>>("Employees", cacheddata, expirationTime);
            return cacheddata;
        }

        [HttpGet("Employee/{id}")]
        public TblEmployee Get(int id)
        {
            var cacheddata = _cacheService.GetData<IEnumerable<TblEmployee>>("Employees");
            TblEmployee filtereddata;
            if(cacheddata != null)
            {
                filtereddata = cacheddata.FirstOrDefault(x=>x.Id == id);
                return filtereddata;
            }
            filtereddata = _demoTestDbContext.TblEmployees.FirstOrDefault(x=>x.Id == id);
            return filtereddata;
        }

        [HttpPut("Update")]
        public void Update(TblEmployee employee)
        {
            _demoTestDbContext.TblEmployees.Update(employee);
            _demoTestDbContext.SaveChanges();
            _cacheService.RemoveData("Employees");
        }

        [HttpDelete("Delete")]
        public void Delete(int id)
        {
            var filtereddata = _demoTestDbContext.TblEmployees.FirstOrDefault(x=>x.Id == id);
            _demoTestDbContext.TblEmployees.Remove(filtereddata);
            _demoTestDbContext.SaveChanges();
            _cacheService.RemoveData("Employees");
        }
    }
}
Step 8: Register Services
Register all services and the ConnectionHelper class in Program.cs (or Startup.cs in older versions):
using Microsoft.EntityFrameworkCore;
using RedisCacheExample.Cache;
using RedisCacheExample.Models;

namespace RedisCacheExample
{
    public class Program
    {
        public static void Main(string[] args)
        {
            var builder = WebApplication.CreateBuilder(args);

            // Add services to the container.

            builder.Services.AddControllers();
            // Learn more about configuring Swagger/OpenAPI at https://aka.ms/aspnetcore/swashbuckle
            builder.Services.AddEndpointsApiExplorer();
            builder.Services.AddSwaggerGen();
            builder.Services.AddSingleton<ICacheService, CacheService>();
            builder.Services.AddSingleton<ConnectionHelper>();
            builder.Services.AddDbContext<DemoTestDbContext>(options =>
            {
                options.UseSqlServer(builder.Configuration.GetConnectionString("DefaultConnection"));
            });

            var app = builder.Build();

            // Configure the HTTP request pipeline.
            if (app.Environment.IsDevelopment())
            {
                app.UseSwagger();
                app.UseSwaggerUI();
            }
            app.UseHttpsRedirection();
            app.UseAuthorization();
            app.MapControllers();
            app.Run();
        }
    }
}
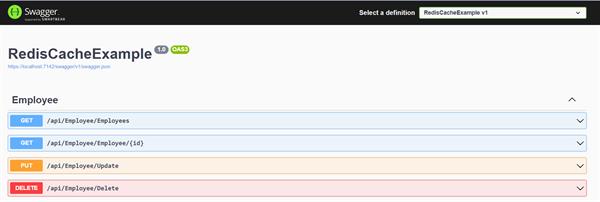
Run the application, and you should see the Swagger screen for testing your API.
Conclusion
In this tutorial, we implemented Redis Cache in a .NET Core Web API. This integration significantly improves performance by storing frequently accessed data in memory, reducing database hits. You can extend this setup to cache other entities in your application, further boosting performance. Redis is a powerful tool for caching and can be used for advanced scenarios like distributed caching and data synchronization across multiple instances.
Thanks, If you like this article please share with your friends😊
Comments
|
|
|
| Follow up comments |
| {{e.Name}} {{e.Comments}} |
{{e.days}} | |
|
|
||
|
|
||
| {{r.Name}} {{r.Comments}} |
{{r.days}} | |
|
|
||